My family has a tradition that has been passed down from generation to generation. I’m sure many other families have it as well, but I like to think it’s unique to us. And that tradition is that we make an absolute shit-ton of food for family gatherings, and then act like it’s everybody else’s fault that they didn’t eat enough food to cover up the fact that:
a) we have no idea how to correctly predict the amount of food an averagely overweight person might consume, and
b) we were unable to find the Duggar-sized homeless family that we had hoped to bring so we could make ourselves feel better about making a 9×13 dish of spinach and artichoke dip for four people.
(To be fair, I only witnessed it from my great-grandmother on down, but I’m willing to assume this went back way further. I can see my ancestors in 13th century Hungary roasting twenty pounds of mutton and complaining about how the Magna Carta was crippling the economy, while wondering what was wrong with everyone because there were thirteen loaves of Challah left over and those should clearly have been consumed by six people.)
(Yes, I know the Magna Carta was in England, not Hungary, shut up you laughed and you know it.)
(Yes, the spinach dip thing actually happened.)
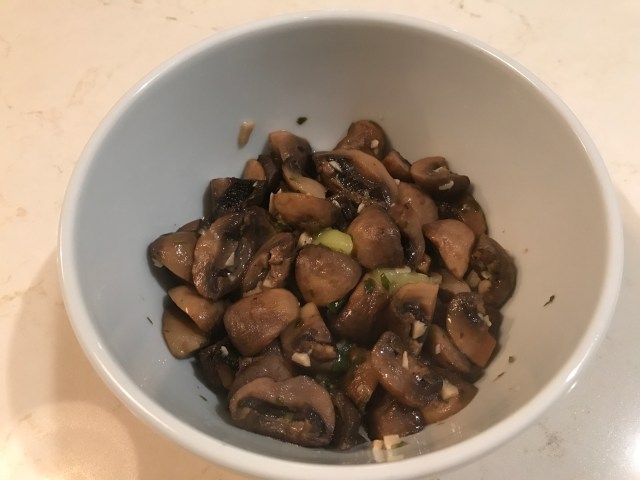
The point of this is, despite us having turkey, mashed potatoes, stuffing, green bean casserole, a baked brie wheel, and bite-size shrimp and grits appetizers, I somehow felt like we might need a little something extra. So I went back to one of my old favorites, sautéed mushrooms.
This recipe comes from Michael Chiarello’s Casual Cooking. I’ve made a bunch of recipes from his cookbooks, and have never had one that was worse than just really, really good.
Now, the thing is, I got kinda lazy with this one, because I’d been in the kitchen for most of the previous two days (and one of them was with my mom, so really it felt more like 19 days). And I didn’t feel like putting in a few hours of work on Thanksgiving Day, so I took some shortcuts.
The mushrooms came out pretty well, and were far less work than the original recipe. I’m going to post the recipe I used, and then below it I will note how I deviated from the original.
I’m not going to kid you, the original recipe will taste better than the one I am giving you. It will also take forever to make (if your family starts watching the John Hughes Anthology box set when you begin prep, you’ll finish cooking around the midpoint of Uncle Buck), and you will have to actively work it the entire time. The recipe I give you will be really good, and will allow you to get smashed on the remainder of whatever white wine you choose to use while you wait for the mushrooms to finish roasting.
CAN I MAKE A MESS WITH THIS RECIPE?
Well the author himself is a pretty big mess, but that’s another story. If you make them my way, you’ll make some mess; if you make it from the original recipe, then yeah, it’s going to get pretty sloppy.
YOU’RE BURYING THE LEDE, WHAT’S THE DEAL WITH MICHAEL CHIARELLO?
Ok, so the good chef has a brief history of bad behavior. And by brief I mean sexual harassment suits, DUI, and possession of a controlled substance (allegedly meth).
THAT’S PRETTY COOL! THE RECIPE, HOW DO I MAKE A MESS OF THIS?
Peeling garlic is messy because the paper skin sticks to everything. The sauce spatters a bit, so you will have to clean up a bit after that. If you make it the long way, then the oil you sauté the mushrooms in will get everywhere.
Roasted Mushrooms
Serves 8 as a side dish
Adapted from Michael Chiarello’s Casual Cooking
Ingredients
2 pounds mushrooms (button is fine, crimini is better), quartered if large, halved if smaller
1/4 cup extra-virgin olive oil
Salt and pepper
4 tablespoons butter
6 cloves garlic, minced
3 tablespoons fresh lemon juice
1 tablespoon fresh thyme leaves
1 cup dry white wine
2 tablespoons chopped Italian parsley
Directions
Preheat the oven to 425F.
In a large bowl, toss the mushrooms and olive oil, and season them with salt and pepper. I typically pour half the oil in, season, toss, then pour the rest of the oil in, season again, and toss again.
Line two sheets pans with foil. Dump the mushrooms evenly onto the pans, and roast for 25 minutes, rotating pans and stirring them up halfway through. Remove ons from oven and dump the mushrooms into a bowl.
Meanwhile, prepare the sauce.
Heat a large skillet or sauté pan to medium heat. Melt butter in skillet.
Add the garlic to the pan and sauté until just beginning to brown (watch this, the garlic can go from just golden brown to dark and bitter in a matter of seconds). Add the lemon juice and thyme, and cook until the liquid evaporates. Add the wine, turn the heat down to medium-low, and simmer for 3-4 minutes.
Pour sauce into bowl with mushrooms, add the parsley, stir, and serve.
ORIGINAL RECIPE VARIATION:
Instead of roasting the mushrooms in the oven, toss the mushrooms with the oil and seasonings, and warm the skillet to high heat. Add more olive oil to the pan, and pour a single layer of mushrooms into the skillet. Give it about 2-3 minutes, until the side in contact with the skillet begins to brown. Toss the mushrooms and continue to cook them down for 3 minutes. Pour the mushrooms into a bowl, add oil to the skillet, and repeat with the next layer of mushrooms until all are sautéed. Once they’re all sautéed, add them back to the skillet, and make the sauce with the mushrooms in the skillet.