So, I’m sitting on my couch yesterday, planning out everything for Thanksgiving dinner. Since I only cook one Thanksgiving a year (we stopped celebrating Canadian Thanksgiving after Trudeau was elected), I had to go back and remind myself how to cook the spatchcocked turkey. And I’m going through websites, leafing through cookbooks, trying to find it, and then I remembered…
OH YEAH I HAVE THIS FUCKING WEBSITE WHERE I POSTED THIS RECIPE LAST YEAR!!!
Anyways, I’m going to put the original post below, because I can’t say anything beyond what’s already there…
Ok, I did update the racist items that your drunk uncle is going to say…
And the Browns reference because they don’t totally suck anymore…
And Wong Wu’s was closed three years ago, not two…
But the rest of it is the same, so let’s jump into the wayback machine and head to the olden days of 2017…

One of the reasons that I’m not a trial lawyer is that I’m not quick on my feet. Like, I’ll be in a conversation with someone, and I’ll take something they say as fact, which on its face is completely laughable, but again, not that swift of a thinker. And then a few days later, I’ll realize that what they said made no sense, and a simple retort would have rendered their point moot, and I’ll say to myself “that’s what I should have said!”
That’s pretty much what happened when I cooked our Thanksgiving turkey. It was a glorious bird, if I do say so myself. And it didn’t hit me until a few days later, oh yeah, people would have loved to have had this recipe for their Thanksgiving. Oops.
But the truth is, people don’t make enough turkey during the year, which is a shame. I mean, turkey is delicious (if you’re one of those weirdos that say that turkey sucks and is flavorless, that’s because your mom sucked and was a really crappy cook, and you should be barred from spreading your genes into future generatio…I mean, you need to try this recipe). It’s relatively cheap – usually turkeys run about $1.50/pound, and you can make so many meals out of one bird. And, if you cook one outside of Thanksgiving, you don’t have to worry about rushing the carving to feed your shitty drunk uncle that’s going to spend half the night complaining about how Alexandria Ocasio-Cortez and Nancy Pelosi are going to force you to have MS-13 gang members over for the holiday next year. So, do yourself a favor and start learning to make one out of season.
You’re probably saying to yourself at this point:
- I’m afraid to google spatchcocking, what exactly does that mean?
- How does he know my family so well?
These are valid questions!
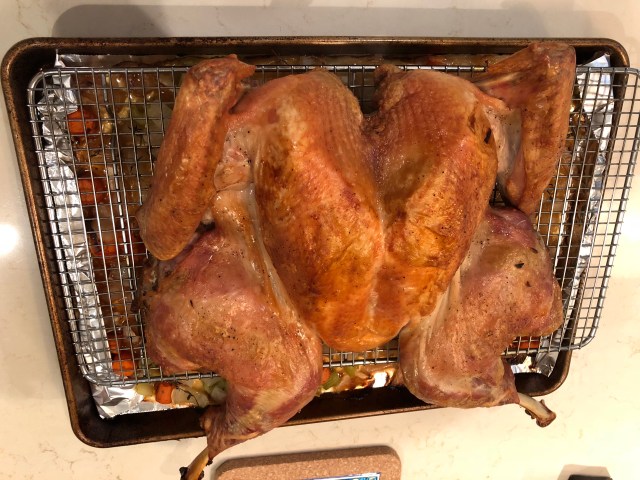
Spatchcocking is a fancy way of saying we’re going to butterfly the bird.
What does that mean? It means we’re going to take the backbone out of the turkey, and then flattening it out by pushing down on the breastbone until you hear it crack, because WHO’S YOUR DADDY MR. TURKEY YOU’RE NOT SO TOUGH NOW ARE YOU I OWN YOU I AM THE PATRIOTS AND YOU ARE THE SAD LITTLE RAIDERS WITH YOUR JON GRUDEN CHUCKY-FACES!!!
Now, you may be saying to yourself, that seems like a lot of work. Why would I want to do this? You seem to have a lot of aggression issues to work out that I’ve managed to get through, why should I crack this guy’s back to help you deal with your problems?
Well Mr./Mrs./Ms. Smarty Pants, the reason why is that you’re going to get the turkey to cook evenly and crisp up the skin to make it absolutely delicious. That good enough for you?
Here’s the thing: there are two types of bird meat: white and dark. And they need to cook to different temperatures (the USDA will tell you that white meat needs to be cooked to 165 degrees, and dark to 180. I will tell you that you can do 150/165 and be just fine.)
When you cook the bird whole, everything gets smushed together, so it’s hard to get everything cooked evenly, so the breast gets done well before the dark. Also, some of the skin gets bunched up into the meat, so it stays sad and flabby. But, if you spatchcock it, everything is laid out in one layer, so everything cooks evenly, and all of the skin is exposed to the heat. The benefit is that you’ll be able to cook your turkey in about half the time of a normal bird, and all of the skin will be cooked super crispy.
So let’s start with buying the bird. For spatchcocking, you’re going to need to get a relatively small bird, no bigger than 12 pounds. Anything bigger than that isn’t going to fit on a sheet pan. Besides, do those 20 pound turkeys look natural to you? Each one of them looks like Morganna the kissing turkey. If you’re like the Duggars, or Phillip Rivers, or one of my ancestors that had 10 kids because no one understood birth control back in the 1880’s, get two 10-12 pound turkeys.
Now, there is going to be planning involved. You’re going to need to get the turkey at least three days ahead of time so it can thaw out, unless you can manage to find a fresh bird somewhere (you’re reading my blog, so you probably can’t). You could speed up the process by covering it in cold water for several hours, but you’ll probably give yourself salmonella, so just stay away from that.
The biggest inconvenience is that you’re going to need a good deal of refrigerator space for the turkey. This would be a good time to get rid of that Chinese food from Wong Wu’s, which closed down three years ago.
Now, the day before you cook your turkey, you’ve got a choice to make – am I going to brine the turkey or not? You’re not going to wet brine it, because it’s a pain in the ass and all you’re going to do is waterlog the turkey, and yeah it’ll be moist but so is a wet sponge and you’re not going to eat that, are you, never mind don’t answer that.
No, instead we’re going to dry brine it, if you’re so inclined. All this means is that you’re going to coat the skin with a mixture of kosher salt and baking powder. This will draw the moisture out of the skin, so it’ll crisp up and brown perfectly. After 12-24 hours of brining, it’s going to get all light and transparent-looking, and you’ll know that it’s ready.
You can also decide not to, but really, if you’re going to take the time to hack a turkey in half, a few extra minutes of work shouldn’t be too much for you. But, if you decide not to, you’ll probably be ok too. Just be sure to salt it before you put it in the oven.
Now, the spatchcocking process. Get yourself a good pair of kitchen shears – really powerful scissors will work in a pinch. You’re going to cut the backbone out of it, which will take a few minutes. Save the backbone, we’re going to use that for the gravy later. Oh, and save the goodies in the plastic bag inside the turkey.
Once you’ve broken the breastbone and the turkey’s spirit, you’re ready to cook!
Now, that backbone you just took out. You’re going to need to hack that into smaller pieces for the gravy. If you have a cleaver, this would be a great time to use it. Also, if you have a cleaver, stay away from me. If you don’t, do the best you can to find some joints in it to cut through easily.
Once it’s finished cooking, and you’ve given it enough time to rest, it’s carving time. Again, we’re going to the video, because I am not even going to act like I can teach you that.
When you start carving it, you’re going to hear that lovely crackling sound of super crisp turkey skin, and the bird will be the best one you’ve ever tasted. And I’m sure you’ll drown it in too much gravy, but that’s on you.
Spatchcocked Roast Turkey and Gravy
From Serious Eats
Serves 10-12
Ingredients
For the brine
6 T kosher salt
2 T baking powder
For the turkey and gravy
3 large onions, chopped
3 large carrots, chopped
4 celery stalks, chopped
12 thyme sprigs
1 whole turkey, spatchcocked and butterflied, backbone and giblets reserved
2 T vegetable oil
1 1/2 quarts chicken or turkey broth
2 bay leaves
3 T butter
4 T flour
Directions
Place the oven rack on the middle position in the oven. Preheat the oven to 450 degrees.
Line a rimmed baking sheet or sheet pan with foil. Mix up 2/3rds of the onions, carrots, celery, and thyme sprigs, and pour them onto the sheet. Place a cooling rack over the vegetables.
Use paper towels to pat the turkey dry, and place it on the rack. Rub one tablespoon of the oil all over the skin. Season the turkey liberally with black pepper (if you don’t brine the turkey, season with salt as well). Tuck the wing tips behind the back.
Move the rack to the oven and roast the turkey until the breasts measure 150 degrees and the thighs register 165 degrees, about 75-80 minutes.
While the turkey is roasting, chop the reserved turkey parts for the gravy.
Add the remaining tablespoon of the oil to a 3 quart saucepan, and heat over medium-high heat. Add the turkey parts to the pan and cook until lightly browned, about five minutes. Add the remaining vegetables to the pan and cook until the vegetables soften and brown, about another five minutes. Add the chicken broth, remaining thyme sprigs, and bay leaves to the pan. Bring the mixture to a boil, then reduce to a bare simmer for 45 minutes. Strain the solids from the broth, and skim the fat off the top.
In the same pan, melt the butter over medium-high heat. Add the flour and stir constantly with a wooden spoon until the mixture is golden brown. While whisking constantly, add the broth to the pan in a steady stream. Bring to a boil, then reduce to a simmer until reduced to 1 quart, about 20-30 minutes. Season with salt and pepper as needed, and cover the pan to keep warm.
When the turkey is finished roasting, remove it from the oven and allow it to rest for 20 minutes. Carve the turkey as desired. Collect any juices from the turkey, and add them to the gravy.


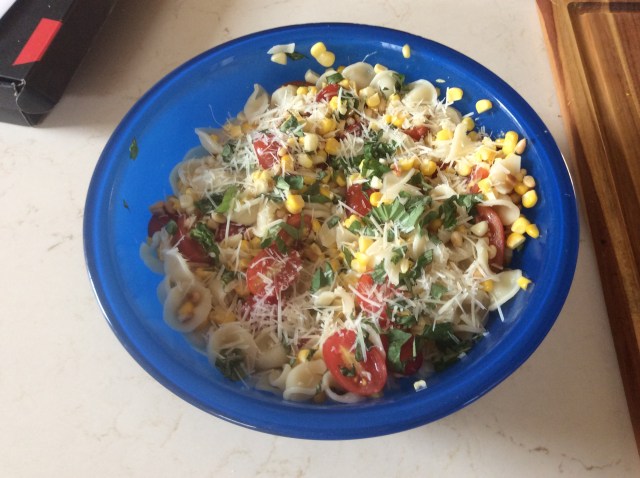 Last weekend, I decided to get all creative and stuff, and went to a farmers market to see what they had for sale, and then create a dish around it.